There’s no point in going to all this trouble of creating tests unless you can see the results of those test runs and see what’s passed or failed. Test logging in TestComplete is quite simple to get to grips with. Yet this logging capability provides a powerful way for you to easily navigate through mountains of test data that get generated as part of lots of test automation runs.
In this module we’ll look at
* How test logs are organise and stored
* What the test log window shows us
* How to filter the logs to see what you need
* Exporting logs in different formats
* How we can add log messages to our scripts
* Test logging options and project properties
First up then lets see how these logs are organised. In the Project Explorer window, scroll to the bottom, and you’ll see the folders where all the log files are stores.
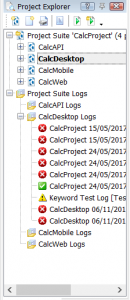
The structure mirrors that of the Project Suite and Projects folders above. So if you run the ‘Project Suite’ you’ll see a log file stored at the Project Suite folder level. If you run a Project you’ll see the test run results stored in the folder for that specific project. If you run an individual test within a project you’ll see the log for that run stored at the relevant Project folder level too.
What’s important to grasp is that for, say each run of a test project, you’ll get one log entry in the relevant project logs folder. So one Project can have ‘many’ test logs (one for each test execution run).
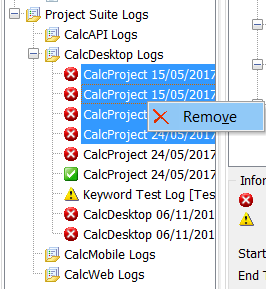
As you complete lots of test runs you’ll find you end up with a lot of log files. Most of which you won’t want to keep. If you want to delete them select the ones you want to delete, right click and select ‘Remove’.
You’ll get the option to just ‘Remove’ (so you don’t see them in project explorer but they remain on the file system) or you can ‘Delete’ (and delete them from the file system – forever).
 When you double click on a particular log file displayed int he Project Explorer you’ll see the log file displayed in the work space area. This work space is broken down into 3 distinct areas.
i) Log Items: Hierarchy of the test items (from the Project Test Items list)
ii) Test Log: list of the log messages created during the run (either Error, Warning, Message, Event or Checkpoint)
iii) Additional Info: sequence of tabs that delivers more info for each Test Log item with a Picture, Additional Info, Call Stack and/or Performance Counters
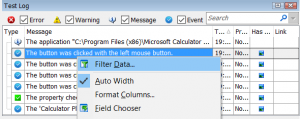
When you want to filter or search your logs you have two options. Either use the basic ‘Search’ functionality (see the search text box about the log entries) or invoke the ‘Filter’ feature. If you right click anywhere in the Test Log you can select the Filter option.
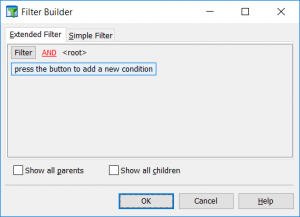
This log filter gives you the capability to define complex conditional logical to display exactly the log entries you need to see. You can also opt to show the parent or child log entries for the entries you find with this filter.
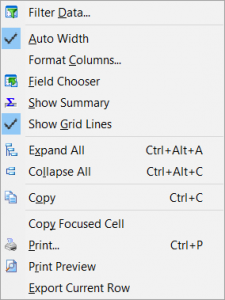
You’ll also notice, when you right click on the log items, the rest of the items available in this context sensitive menu. Among these options you have the capability to format the display of the log items and copy entries when needed.
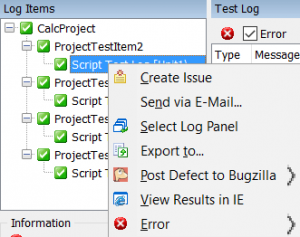
If you right click in the Log Items panel you get a different context sensitive menu. From here you can create defects/issues in external tools and export the log to various different formats.
That’s what things look like when you’re viewing the logs. Next thing to look at is how you get your tests to create log entries and how those tests can be directed to structure and organise the log entries. For this we’ll look at the Logging operations found in the operations panel when developing your tests.
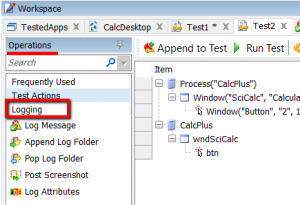
In the operations panel make sure you select the ‘Logging’ category. Then you’ll see all the logging operations you can use in your tests. Drag and drop these into your tests to implement the function when your tests run. For example create a new folder to put test log messages in with the ‘Append Log Folder’ (append all new log messages to the new folder). When you’ve finished adding log messages to that specific folder you can start putting them back at the parent folder level by using the ‘Pop Log Folder’ operation. Just need to add your own log message? Then use the ‘Log Message’ operation.
Last to mention then are some of the more important project logging options and properties. Two areas to think about here. Options (global to TestComplete) and Properties (specific to each project).
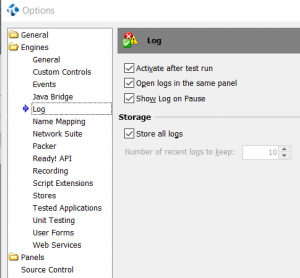
Log options allow you to set global TestComplete options to define how log files are managed. Most are self explanatory but the two you might consider changing are:
Activate after test run: whenever a test run ends the work space area opens with the log file displayed. If this starts to annoy you then deselect it here.
Store all logs: by default TestComplete will save all log files and keep them forever. Log files stack up with this selected. So you could deselect it and then define how many you want to keep. Go over this number and TestComplete deletes the oldest log file automatically for you.

Next then are the project specific settings. Found under the properties tab in the project work space. The two most important settings here being:
Post image on error: if you switch of the visualizer on play back (to save space) then enabling this can help you catch screen shots when things don’t go quite right during the test run. Worth keeping switched on
Save log every: Normally TestComplete only writes the log file to disk at the end of the test run. Sometimes your system will crash or reboot and the log file won’t get written to disk… you lose all your test run logging. Enable this and you’ll at least keep most of the log when this happens. Very useful for long test runs.
So that’s pretty much it on the logging side of things. We’ve looked at How test logs are organise and stored, what the test log window shows us and the Test logging options and project properties. Next up we’re going to look in more detail at Name Mapping and identifying objects in the application you’re testing.