In module 1 of this Fast Start TestComplete course we’ve looked at the TestComplete development environment. You might not necessarily understand what everything does but you should be familiar with these core components:
Project Workspace – where you develop your automated tests
Object Browser – where you can examine the application you’re testing
And within each of those components you should understand what these sub components are for:
Project Workspace- Project Explorer: shows the artifacts created for your automation project - Workspace: where you create and modify those different artifacts
Object Browser- Object List: hierarchy of objects (processes, windows & browsers) on your system - Properties: a list of characteristics relating to a specific object - Methods: a list of actions a specific object can carry out
If you’re still wondering about any of these bits then maybe it’s worth going back and looking at the Getting Started Module. If you’re happy with this then let’s walk through the steps you’ll need to follow to build your first automated test in TestComplete.
We’ll break this down into 3 key stages:
Before we can create our first test we need to create a project that will contain that test. Before we can create our first project we’ll need a Project Suite that will hold the project. Remember, a project suite can contain one or more projects. A project holds all the artifacts needed for a particular test automation effort. So from the starting page when you first open TestComplete. We’ll walk you through this in the next few sections of this blog post and the video below:
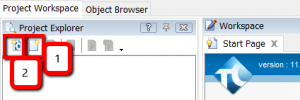
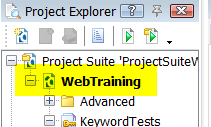
Create your Project suite, by clicking on the ‘New Project Suite’ button (1) and then enter the name for this suite. Once that’s created click on the ‘New Project’ button (2). It’s a bit back to front but you’ll be creating more Projects than Project Suites so it’s kind of makes sense to have the ‘New Project’ button on the left.
When you create the project you’ll be walked through a wizard where you’ll need to enter the following:
* – we wont get into scripting in this course but we might touch on the odd little bit of code so we may as well select Python at this stage.
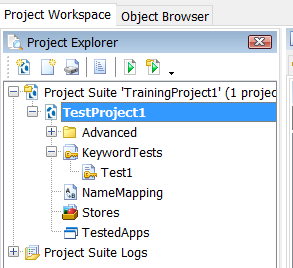
Then click ‘Finish’ and we’ll have our first Project which is contained with our first Project Suite.
Before we go any further we’ll need an application to test. To make our lives easy we’re going to use an application called Calc Plus from Microsoft.
Search the web for ‘Download Calc Plus’
Microsoft don’t actually provide this as a download’able application anymore but you will find it on sites like ‘download.cnet.com’.
We’re using Calc Plus because it exposes a lot of it’s object information to TestComplete. We’re not using the default calcualtor supplied with Windows because this one doesn’t expose everything we need. Calc Plus just makes our life easier as we start out learning TestComplete.
Now you have Calculator Plus, and before we start recording our first test, lets just check out the ‘Tested Apps’ feature. There will be a lot of processes running on your PC or Server. Adding your Calc Plus application as a ‘Tested App’ makes it easy to focus on the application we’re testing. If you follow the next few steps you’ll see how…
1. start Calc Plus
2. click on the Object Browser tab
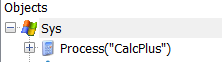
3. locate calculator plus in the objects list
4. right click and select ‘Add Process to Tested Apps’

5. click the ‘Yes’ button to confirm the addition
6. If you’re prompted with ‘Do you want to add the Tested Applications’ project item select ‘Yes’ followed by ‘Ok’
7. go back to the ‘Project Workspace’ tab
8. double click on the ‘Tested Apps’ node
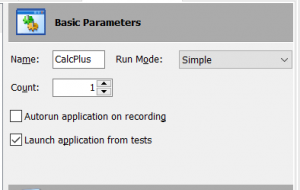 At this point you should see ‘Calculator Plus’ in the list of Tested Apps. What this gives us is the ability to filter, auto start and focus our test effort on just this application. For now the settings for this tested app should be as follows:
Next we’ll create our first test. Our first test will be a mixture of adding test steps manually and recording parts of the test too.
To start off then we’ll manually add a few test steps before we record some test steps.
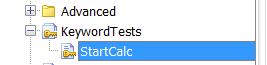
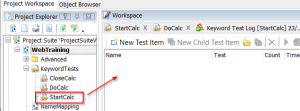
1. Rename the keyword test ‘Test1’ to “Start Calc”
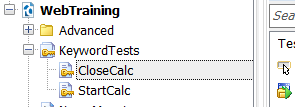
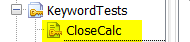
2. Add a new Keyword test by click on ‘KeywordTests’ and selecting ‘Add New Item’

3. Call the new Keyword test ‘Close Calc’
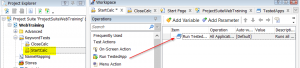
4. Double click the ‘StartCalc’ node so that it opens in the workspace and drag the ‘Run TestedApp’ operation into the workspace, selecting ‘Calc Plus’ as you do so
Then right click on the ‘StartCalc’ test in project explorer and select run start calc. This’ll just make sure we have Calc Plus running so that we can complete the next step.
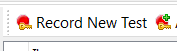
5. Click the ‘Record New Test’ button
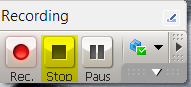
You should see the recording tool bar open as TestComplete records your actions. And then record a few actions in Calc Plus (e.g. click the keys 2 * 2). Do NOT close the Calc Plus application at this point.
6. Then click the stop button on the recording tool bar
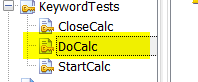
7. Rename the new test ‘DoCalc’
8. Double click on the ‘CloseCalc’ test item to open it in the workspace area
9. Click the ‘Append to Test’ button to record and add a new test step to this test
10. The recording tool bar should open. And at this point we just want to click the Calc Plus close window ‘X’ button
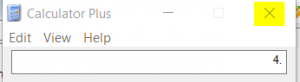
Then click stop on the recording tool bar.
At this point we’ve created all the component tests we need to run a full test scenario. All we need to do is link these together and run them. We do this at the project level by adding multiple project test items that call these tests in sequence.
1. Double click the ‘Project’ node in the Project Explorer
2. At this point you should have a blank ‘Test Items’ panel open for the project. We need to drag our tests in to here
3. Dragging all three items in, so that we have them in this order…
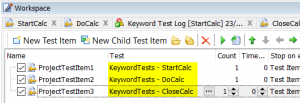
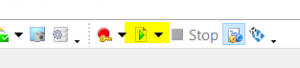
At this point we have a project with three test items that is ready to run. We can click the run project icon and see everything run in sequence
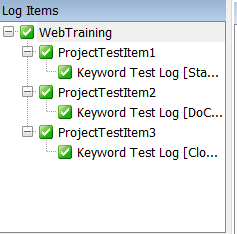
Assuming this runs successfully you’ll see a log file created which shows each test item running in turn successfully
And that’s it. Our first automated test. Created using a combination of building keyword tests manually (using drag and drop) and by recording tests. We’ve built the project in a modular fashion with three test cases pulled into the project list for execution. This way we can reuse these tests in other scenarios as we build out our test cases.